Ever wonder how to change fonts on your WordPress theme? Since Google fonts release, WordPress Themes adopted them and added to theme functionality. But how can you do it if you’re not a coder? Today, I’ll show you How To Use Google Fonts in Your WordPress Themes, coder and non-coder version.
Why would you want to change font?
The answer is simple, we get tired of using the same font over and over again. Plus, using different kind of fonts can help us convert our website well. Not to mention the great selection Google Font has. And since typography is the trend now, we should jump and take advantage of it.
What font is it?
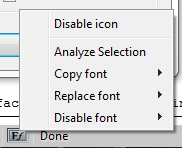
If you see a website that has a nice font, and you’re wondering what is the name of that font. I’ll show you a trick, if you’re using Mozilla download an add-on named Font Finder. Once installed, all you have to do is active the add-on and click on the font.

How to use Google Fonts?

Now that you know what kind of font you’d like to use, assuming it’s available on Google Fonts 🙂 For example, you wanted to use Roboto Condensed. We need to search in and hit the Add to Collection.

Next is to hit Use, and copy the @import on your CSS stylesheet, or you can do it directly into your theme. Head to Appearance > Editor and paste it at the bottom.

After that, assuming you wanted to use this in the entire content font. You’ll add this piece of code in the body tag or p tag.

Now, save it and refresh your page. You’re now using Roboto Condensed font! If you’re the type that doesn’t mess around with your theme and use a plugin instead. There’s this plugin called WP Google Fonts, just installed it and select the font and you’re good to go!
Hope this is helpful to you, and you’ve learn something on how to use Google fonts in your WordPress theme. If you have some comments or suggestions, please let me know below.

