


Ever wonder how hard it is to set up a VPS Server in DigitalOcean? Actually, it’s pretty straight forward, just follow my lead on how to set up your vps server and how to get it running after.
Now, if you are thinking why would you upgrade your current hosting to VPS, you can check out the difference of Shared Hosting vs VPS vs Dedicated Server.
What is this Tutorial About?
This guide will show you how to get a VPS up and running, using DigitalOcean as the provider (you can use any). Configure a user account and replace the root account, secure the SSH server (added security measure).
We won’t cover
We won’t cover setting up a web server, game server or configuring a domain name. Those will be covered in a different tutorial.
Getting a VPS Server
There’s a lot of VPS Server on the internet, you have to select the best vps provider. For today, we will use DigitalOcean since they are very good provider to me. You can choose whoever you want.
They are fairly new to the VPS World last year. They are very cheap vps server and have been so reliable (so far). The speed is amazing and the control panel is very clean and nice, it’s probably one of the user friendly panel I’ve seen (I’m looking at you godaddy).
They call their VPS “droplet“, which is what we will be using throughout the tutorial, you can choose the $5 / month plan or use a their coupon code for additional 3 months free!
Getting the VPS Server
I prefer Debian OS for servers, I think it’s reliable and has great software repositories, another thing that I like about it is the stability. If you want to use different OS, feel free to do so. Hopefully, you can still follow this tutorial using your preferred OS.
Go to http://digitalocean.com and create an account, just add your credit / debit card or paypal account and fill in other info. Create a droplet, you’ll end up with a creation screen. Enter your hostname in the hostname field, let’s call it “vpstutorial”.
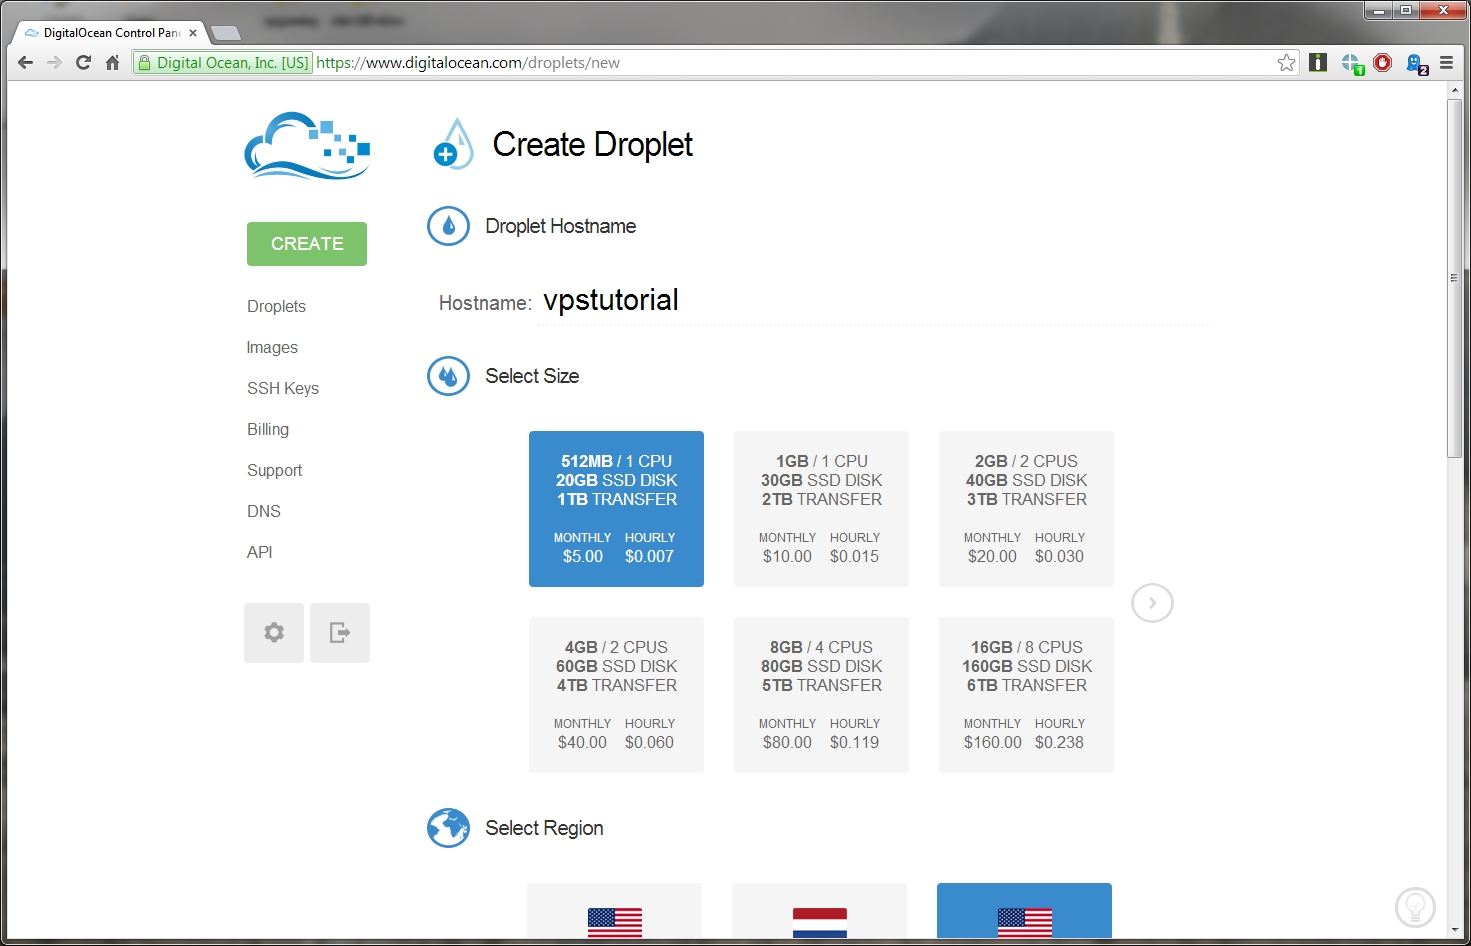
Select the first option as I have. Its the cheapest, next is to select which ever region is closest to you. I went with San Francisco since I’m from Philippines, and this will provide the lowest ping for me. After that, select the distro! Select the Debian logo, and then Debian 7 32 bit (x32). Screenshot below.

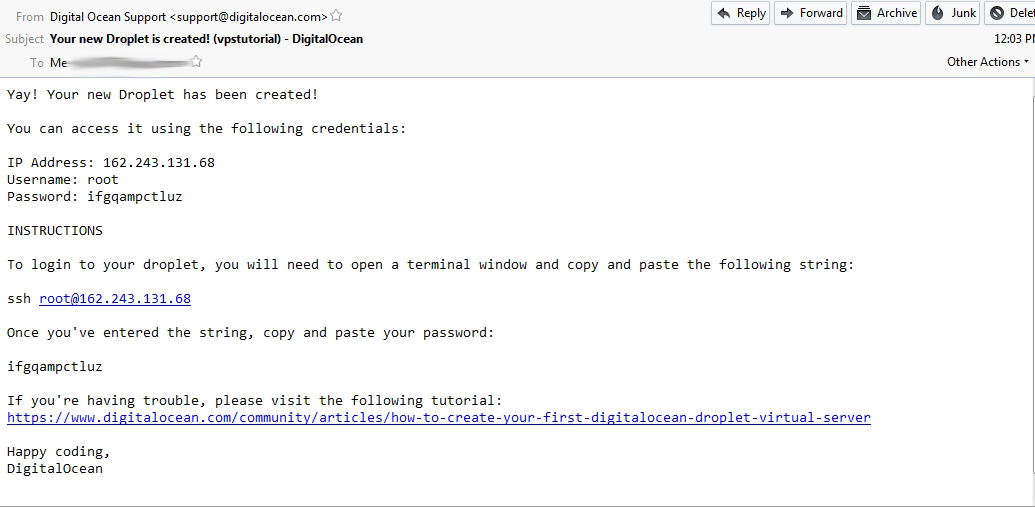
Then, click that great big “Create Droplet” button, you will then see a loading bar as your new Droplet is created. It should take less than a minute to create. Once that’s done, you will received and email about the details of the VPS.
Testing our VPS Server
It’s time to test our new server, now we will do this each step for Windows and Linux (or Mac, should be the same) users, if you are using Windows, follow the windows tutorial, and so on.
Linux (or Mac)
To try out your new server, open the terminal window CTRL + T (look in your application folder to make sure), for Mac users, use the spotlight search for terminal.
Type in
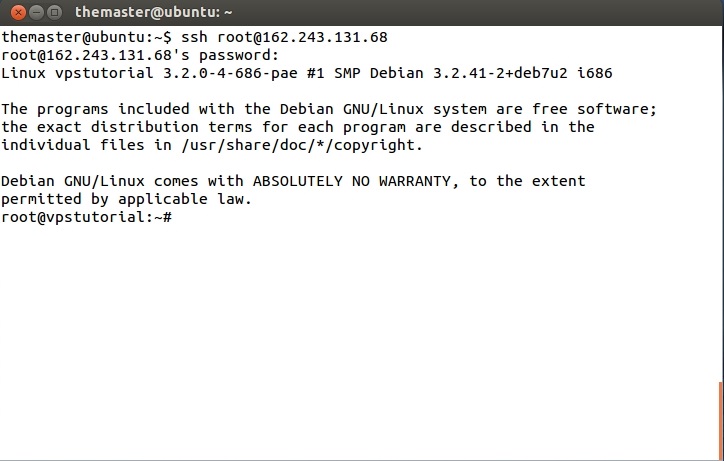
ssh root@IP_OF_VPS
Where IP_OF_VPS is the IP given to you from the email, you should received the IP from your VPS provider. Next is adding the security key, type yes, and enter your password that was also included in the said email. If all goes well, you’ll be connected to your new VPS Server.
Notice the line where you changed the user and IP of the server, rather than the IP and name of your computer? You should have the following:
Now that we have logged in, let’s make a new user account. To do that, type:
adduser A_USERNAME_YOU_WANT
where A_USERNAME_YOU_WANT is obviously, your choice of username. I went with “vpstutorials”. Follow through the short prompts.
Once you’re done, you can login to your new user by typing:
login THE_USER_YOU_JUST_CREATED
Since I used the username “vpstutorials”, text onthe left should have changed to include your username and says you are now logged in. You can type “logout” to actually logout.
On the left, where it says include “root”, typing “logout” again will disconnect you from the server and close the window.
Securing your VPS Server
Why do we even need to secure our VPS Server? In any case, someone can wreak havoc to your server and destroy all of your files. Or perhaps use it to do illegal stuff and you’ll be accountable. Better to secure it now, than to suffer it later.
We will secure it using “keypair”, key pair is a set of two files that go-together, these are mathematically related. It works like this, one file is put on the server (called public key), and the other (private key) you keep, Whenever you want to access your server, you essentially send your public key to your server, and will be checked against the private key. If it matches, you can then connect, if not, you’ll have denied access.
The biggest difference with keypair and password is that the data is stored in the file, much longer than your usual password. Another added security is where you can put the password on the key file when you send them to your server for checking.
Because of this, key pairs are a very secure way of connecting to servers. Websites like Facebook and Google use use similar concepts to secure data you send to them.
Linux (Mac users)
Setting this key pair system up via Linux or Mac is simple. Open up a terminal and type the following commands. (DO NOT LOGIN TO YOUR SERVER TO DO THIS). These commands should be entered straight into your terminal window. We are executing these on your local computer:
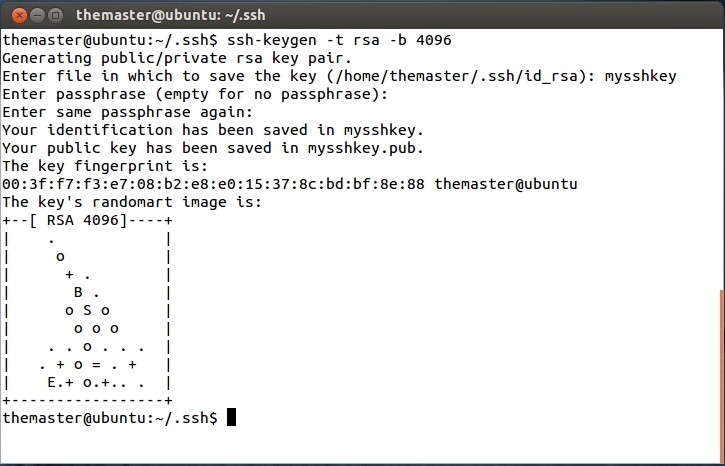
mkdir .ssh
cd .ssh
ssh-keygen -t rsa -b 4096
(If you are told that “The directory .ssh already exists”, just use the last two lines above).
First three commands, change the ‘working directory’ of the terminal to home directory, create a folder called .ssh, change that to new .ssh folder. After that, generate a pair of keyes. The ‘-t rsa’ option tells it to make them type ‘rsa’ (check the the definition on Google) and it will make the size of the keys to 4096 bytes.
The larger the number, the harder it will take to do a bruteforce attacks. Next is the name of the keypair, call it anything you like, we will call it ‘mysshkey’.
You will also create and confirm your password for these keys, once completed, you terminal window should look like this below:
Now that the two files we just created are sitting in our folder on our computer, we need to put one of these (the .pub) on the server, this will make the other key that will be used to check. To do this, type
id YOUR_NEW_USER@serverip
YOUR_NEW_USER is our username, which we created earlier.
It will ask for the password of the new user, enter the details and it will check the authorized_keys file. If you wanted to login to your server without the password, simply type
NAME_OF_YOUR_KEY_FILE NAME_OF_YOUR_NEW_USER@serverip
(replacing everything as needed)
This will ask for password of your key file, rather than the user password.
Windows
For Windows users, things are a little bit different, to create a keypair we will download PuTTYgen from here. Install it and click on ‘generate’ button. It will ask for some randomness, under the progress bar.
Type and confirm your password for the keys in the two textbox that says ‘key passphrase’ and confirm after. Click the button that says ‘save private key’. Highly suggest to create a new folder on your desktop and put it there.
Next is the textarea with a scroll bar that has ‘public key for pasting’ above it. We need to open notepad and paste the contents of from that field, hit save and call it ‘publickey.txt’
Now, we need to put one on the server, download this program http://winscp.net/eng/index.php and install it.
After that, fill in the details,
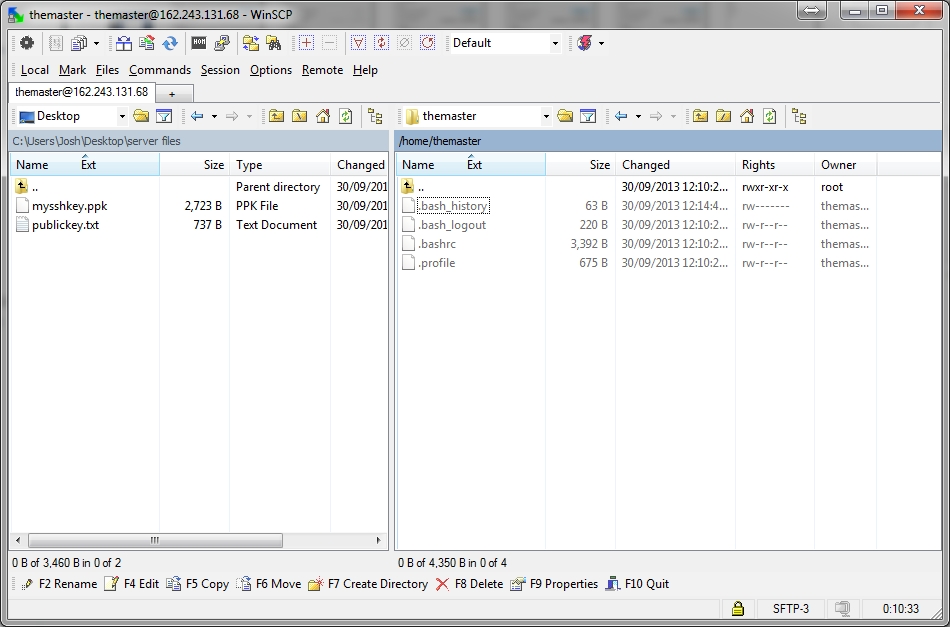
The folder on the right will be different. Click on this button, and navigate to the folder that you saved the keys in.
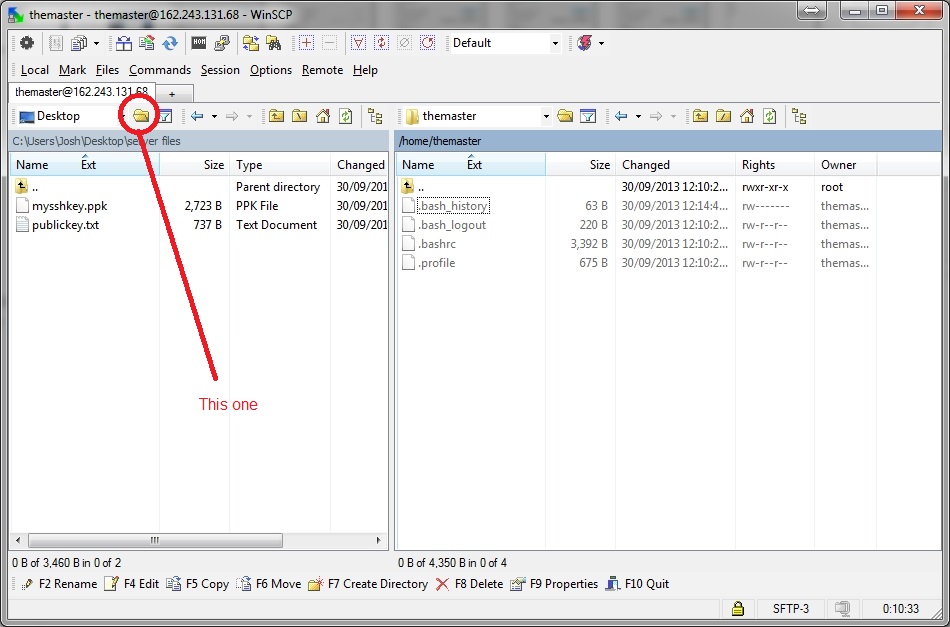
Next is to click on the white space, where server files are shown. Click on ‘create directory’ and call it ‘.ssh’. Double click on the new folder to open and drag ‘n drop the file we just created called publickey.txt. Click copy and hit ok. It should be uploaded to our server.
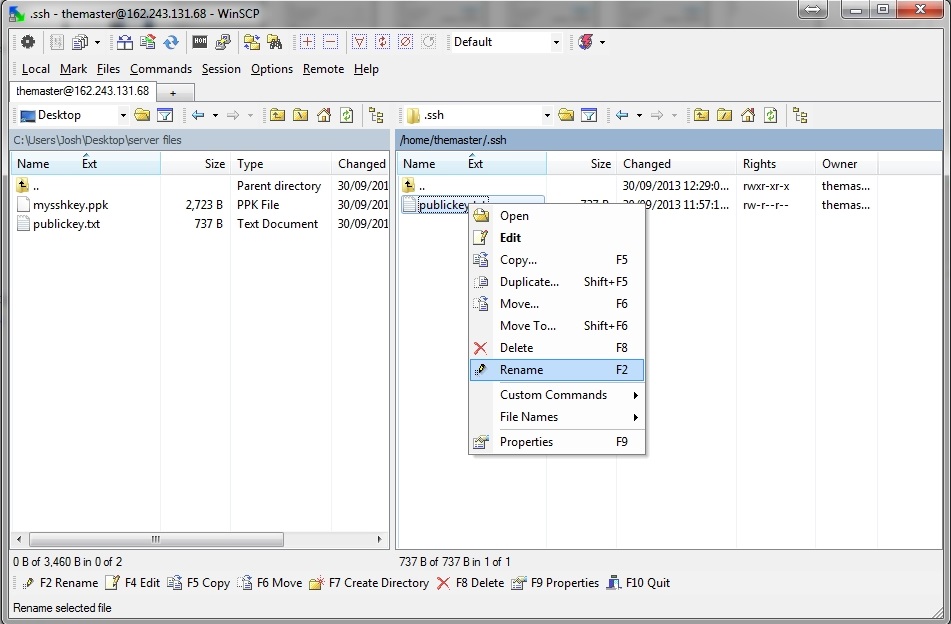
Change its name to “authorized_keys”. You can exit WinSCP now.
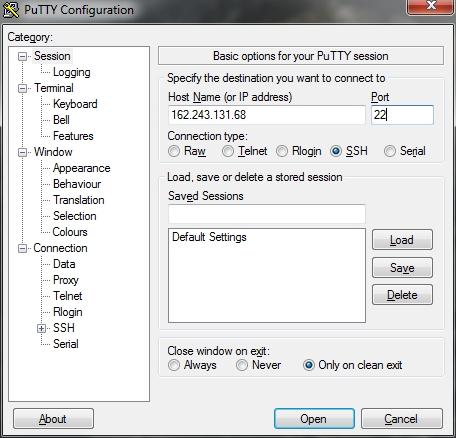
To make sure that this worked, open up PuTTY.
Enter the IP of the your server into the box. Then, on the left side you should see some options. Located “SSH”, and press the “+”. Click on “auth”.
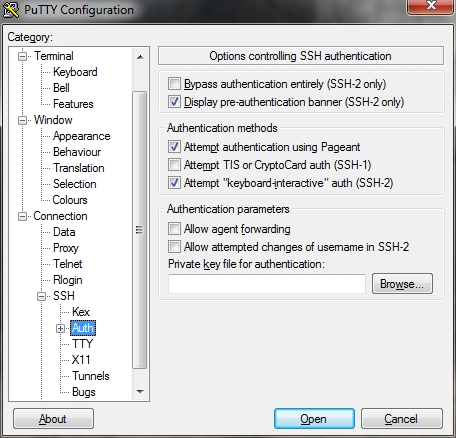
On the right, hit browser, locate the file that has ‘.ppk’ extension, click to open and should be asked for a user, type it in same with password.
You should be logged in, and see a similar screen to when you first logged into the server.
Setting new user as admin
Now, you can’t login as ‘root’ or admin user. We will use ‘sudo’ to make ourself admin of our server. Login into your server, the one we created earlier, and use this command.
su root
Type in the root password (in the email). You’re now sort of “logged in” as the root user. But not really. You’re just acting as the root user temporarily. Now do this:
apt update
Wait for the return of command.
apt-get install sudo
If it says “sudo” is already installed, great! If not, type yes if it asks for confirmation, let it install, then continue. Next
adduser YOUR_SERVER_USERNAME sudo
This will add the user that you created previously, to the list of people allowed to be admins. Type “exit”, then type “logout”.
Log back in again and try using this command:
sudo apt-get install
followed by entering your user password.
Now, you no longer need to login as root. You can login as your normal user, and still use admin commands. Just remember to put “sudo” in front.
Conclusion
This is one of several steps to be a good server admin, at the moment your server doesn’t do anything. Make sure you add more security and list the steps properly so you’ll have your own checklist.
If you have other security tips, or other stuff you can share with us, you can do so in the comments below!
